Google Analytics 4 Integration
The GA4-Integration for the Booking Engine works through Google Tag Manager integration. Google Tag Manager allows integration without touching any HTML or Javascript.
This guide assumes you have already set up your Google Analytics 4 account. If that's not the case, please consult Google Documentation for How to setup Google Analytics 4.
Google Tag Manager Integration
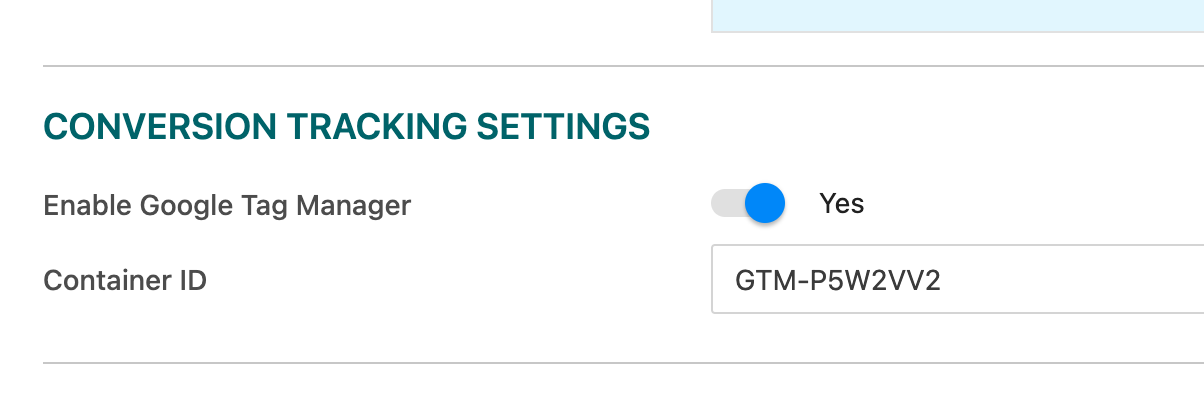
As soon as you have enabled GTM for your property, the booking engine will integrate GTM and fetch the configured container. (You'll find the configuration under Booking Engine > Overview > Website (Direct) > Circle configuration)
The booking engine will make all defined methods of the Tracking API available to your GTM configuration. Each method makes the data available as a custom event. You may configure to track it via custom data events in GTM.
Google Tag Manager Container
To further ease your tracking efforts, roommaster provides an example container configuration setting up Google Analytics 4 event tags for these events:
- viewOffers
- viewServices
- viewRoomDetails
- viewPackage
- viewRoomPermlink
- viewPackagePermlink
- shoppingCartElementAdded
- shoppingCartElementRemoved
- viewPersInfo
- viewConfirmation
Additionally, it provides you with an example configuration for the Google Analytics ecommerce events purchase,add_to_cart, remove_from_cart, begin_checkout, aswell as view_item_list.
Importing Google Tag Manager Container
To start the import of the GTM container, log into your Tagmanager-Account. If you do not possess a GTM-Account, please consult the Google Tag Manager Documentation on how to set one up.
Afterwards follow these steps:
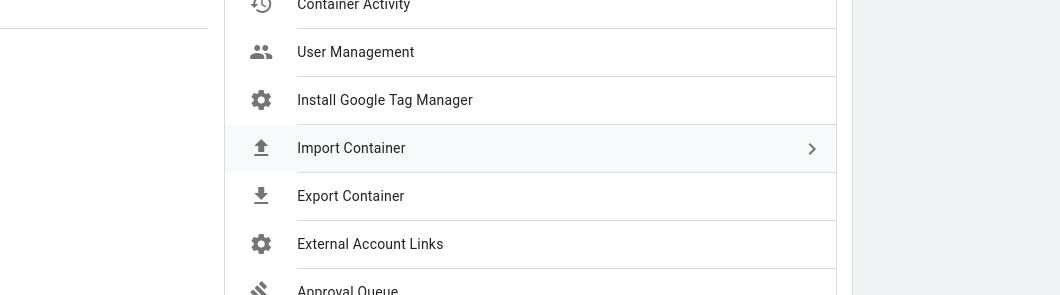
- Go to Admin tab
- In the container column, click on Import Container
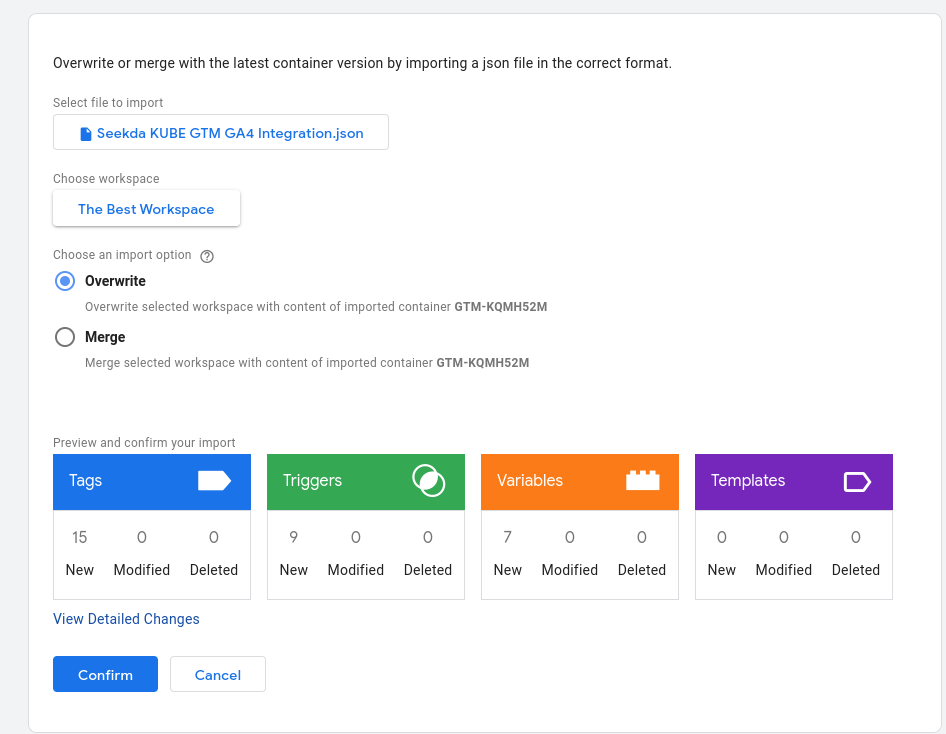
- Use the GTM GA4 Container.json file as input for the container file.
- Select your workspace. If you have just one, click on Existing and select the default workspace.
- If you have a brand-new container, you may use the option Overwrite. If this is not the case and you want to retain existing configurations of your GTM container, use the option of Merge and Rename conflicting tags. GTM will show you a preview of what changes you can expect. Click on Confirm and proceed.
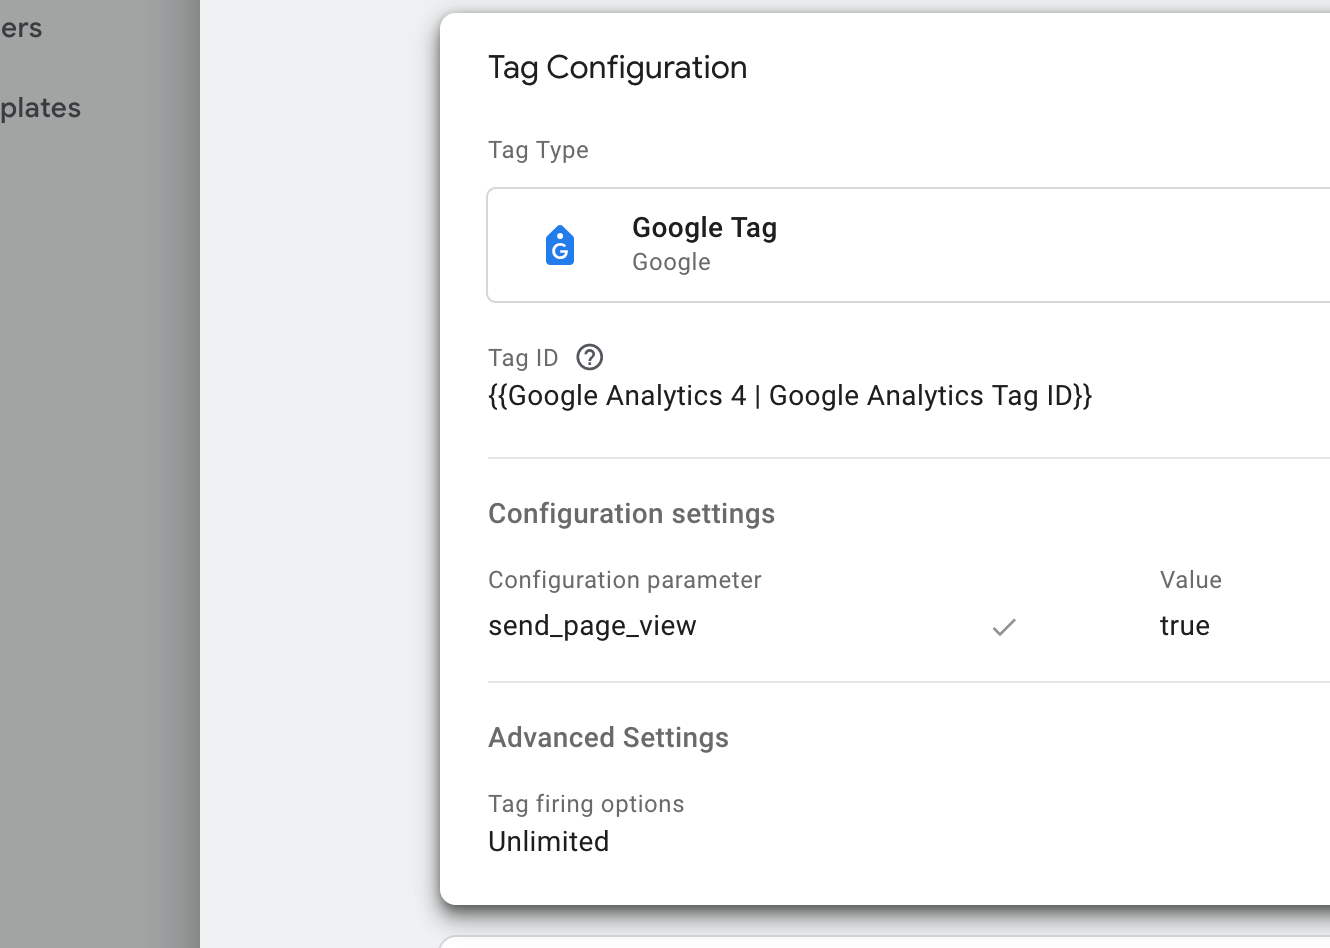
- Afterwards, you need to set your Google Tag ID and your GA4 Measurement ID. You'll find both in your Variables definitions under the names Google Analytics 4 | Google Analytics ID and Google Analytics | Measurement ID. There, you must remove the example ID and replace it with your own measurement ID and analytics ID. If you don't know where to find it, please consult the Google Tag Manager documentation Setup your Google Tag and the Google Analytics documentation on the Setup data collection for websites on how to locate it.

- Finally, you need to submit your updated Google Tag Manager container. This will make it available to the Booking Engine. You'll find the button in the top-right corner.
From now on, you'll receive Google Analytics 4 events!
Advanced GA4 eCommerce Configuration
Google Tag Manager has problems parsing object arrays, especially if more than one data source has to be combined into one Google Analytics variable. To work around this limitation, the booking engine offers a way of manipulating what data is sent to Googles data layer.
To make the booking engine send the purchased items and provide insights into the current shopping cart, go again to the booking engine configuration page. (Booking Engine > Overview > Website (Direct) > Circle configuration in your hotel manager)
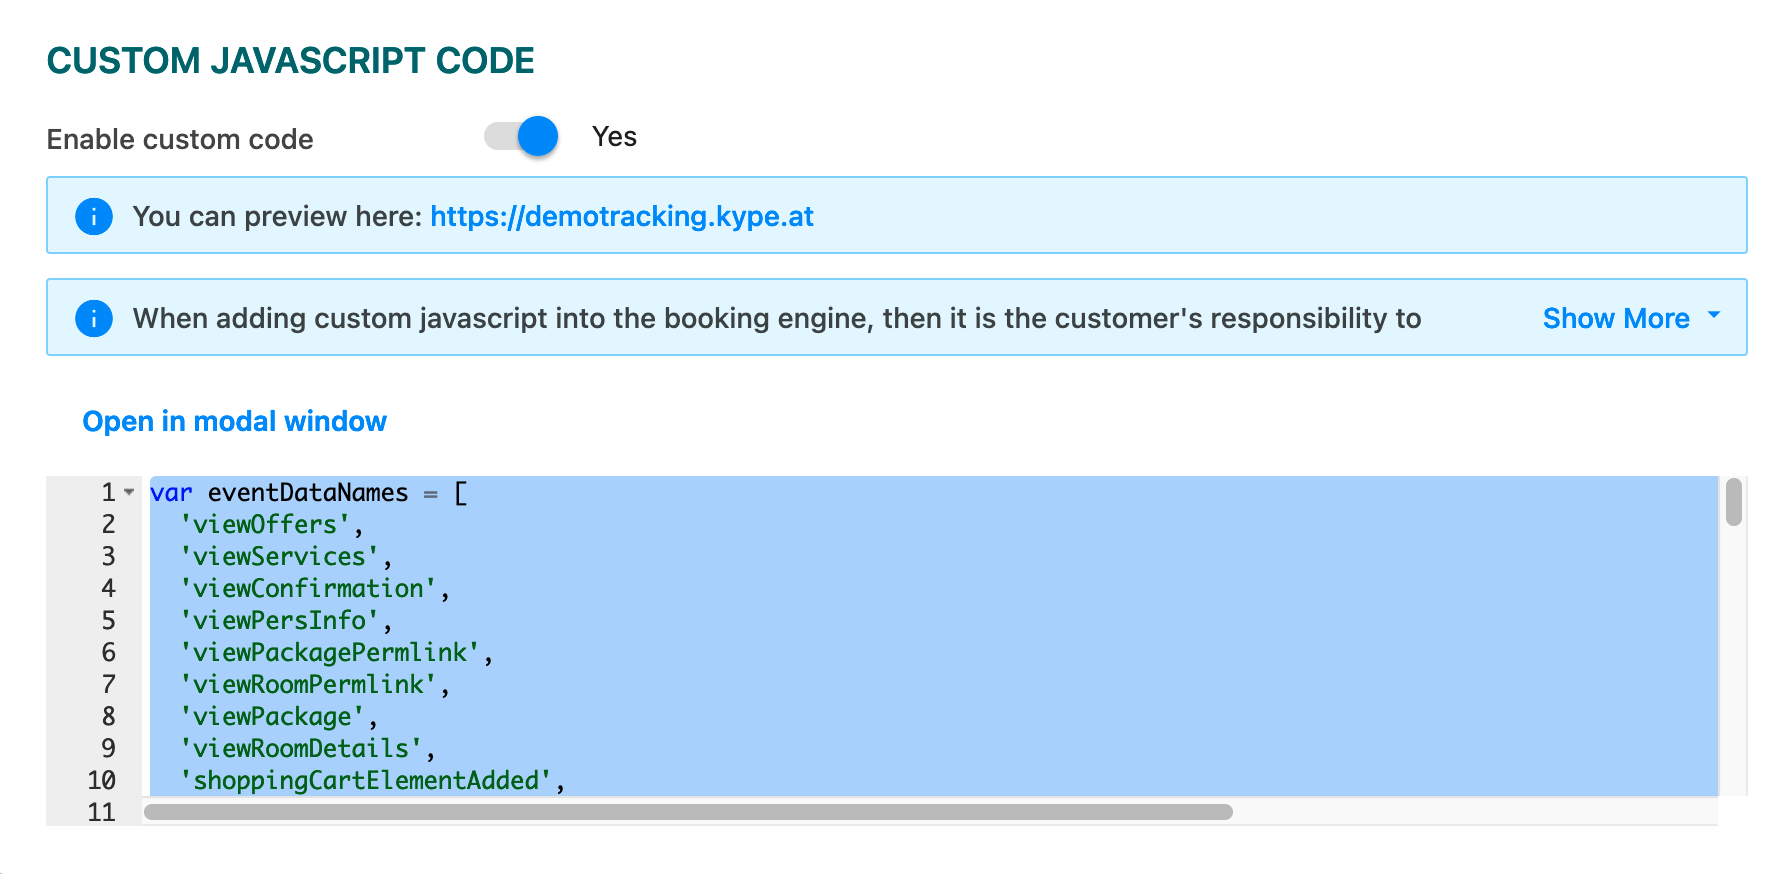
There, you need to set Use Custom JS Code to Yes and copy these scripts into the Custom JS textbox:
window.bookingFlowTrackingInterceptor.add('viewConfirmation', function(eventData) {
var items = [];
eventData.bookingData.rooms.forEach(function(room) {
items.push({
item_id: room.roomCode + '_' + room.roomRate,
price: room.roomTotal,
});
});
eventData.bookingData.services.forEach(function(service) {
var quantity = typeof service.quantity === 'number' ? service.quantity : 1;
var pricePerService = service.serviceTotal / quantity;
items.push({
item_id: service.serviceCode,
price: pricePerService,
quantity: service.quantity
});
});
eventData.bookedItems = items;
return eventData;
});
window.bookingFlowTrackingInterceptor.add('viewServices', function(eventData) {
var items = [];
var services = eventData.services || [];
services.forEach(function(service) {
items.push({
item_id : service.code,
price: service.unitPrice
});
});
eventData.viewedItems = items;
return eventData;
});
window.bookingFlowTrackingInterceptor.add('viewOffers', function(eventData) {
if (eventData && eventData.rooms) {
var items = [];
eventData.rooms.forEach(function(room) {
var rates = room.rates || [];
rates.forEach(function(rateCode) {
items.push({
item_id: room.code + '_' + rateCode
});
});
});
eventData.viewedItems = items;
}
return eventData;
});
window.bookingFlowTrackingInterceptor.add('*', function(eventData) {
if (eventData && eventData.currentShoppingCart) {
var rooms = eventData.currentShoppingCart.rooms || [];
var services = eventData.currentShoppingCart.services || [];
var items = [];
rooms.forEach(function(room) {
items.push({
item_id: room.roomCode + '_' + room.rateCode,
price: room.total
});
});
services.forEach(function(service) {
items.push({
item_id: service.serviceCode,
quantity: service.quantity,
price: service.total
});
});
eventData.shoppingCartItems = items;
}
return eventData;
});
function enrichShoppingCartActionForGA4ECommerceTracking(eventData) {
var total = eventData.elementAdded.data.quantity * eventData.elementAdded.data.price;
var itemId = eventData.elementAdded.data.roomCode + '_' + eventData.elementAdded.data.rateCode + '_' + eventData.elementAdded.data.serviceCode;
var items = [{
item_id: itemId,
price: eventData.elementAdded.data.price,
quantity: eventData.elementAdded.data.quantity
}];
eventData.shoppingCartAction = {
total: total,
currency: eventData.elementAdded.data.currencyCode,
items: items
}
return eventData;
}
window.bookingFlowTrackingInterceptor.add('shoppingCartElementAdded', enrichShoppingCartActionForGA4ECommerceTracking);
window.bookingFlowTrackingInterceptor.add('shoppingCartElementRemoved', enrichShoppingCartActionForGA4ECommerceTracking);
The only thing left to do now is to test it. As soon as you browse your booking engine, events should be sent to Google and received. If you're using an adblocker, do not forget to disable it before trying it out.
Cross Domain Tracking within the Booking Engine
Cross domain tracking needs to be configured in your Google Analytics account and in the booking engine widgets as well. You'll find information on how to setup GA4 in Googles documentation [GA4] Setup Cross-Domain Measurement
The google analytics tracking is based upon two values (documented here Google Tag Reference):
- The client_id of the viewer
- The session_id of the current viewer session
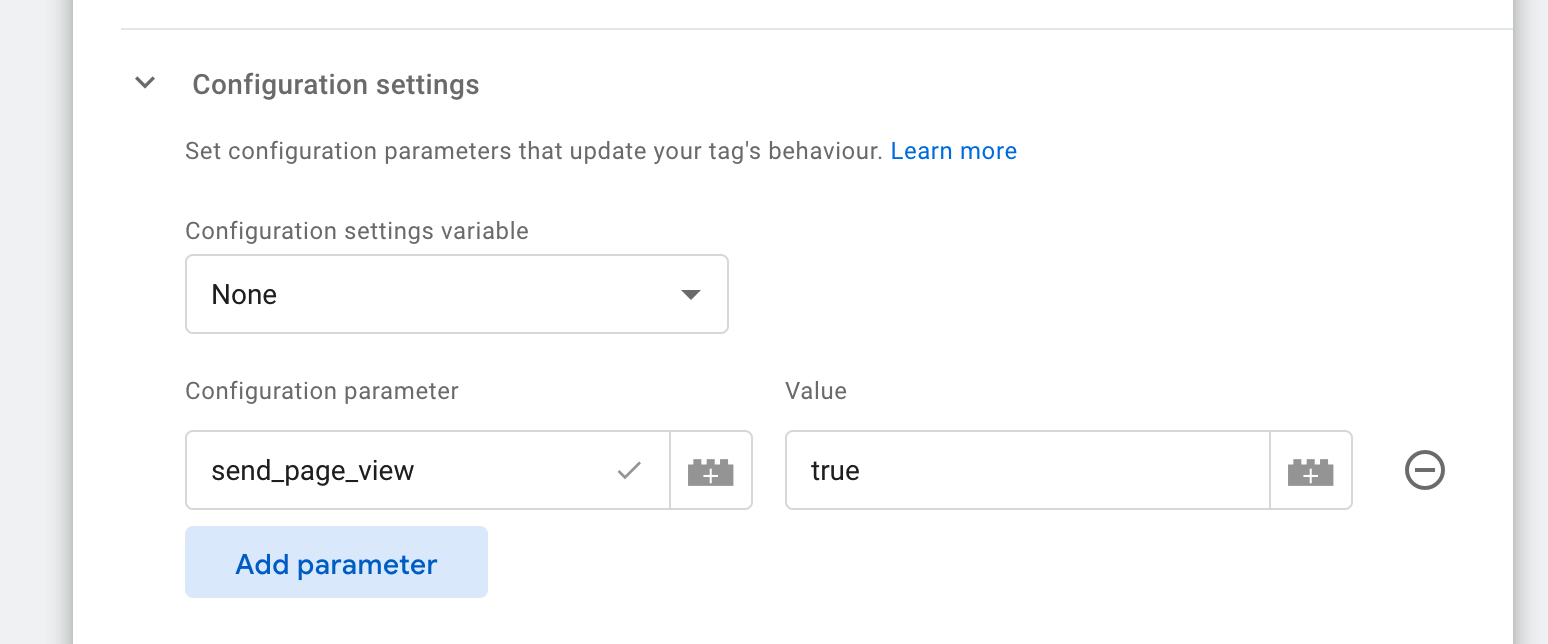
The widget - if Google Analytics 4 is enabled - will provide those values within the URLs. The latest tagmanager template will already include the necessary variables and configurations to utilize them. If you have used an older version or setup your tag manager differently, you will need to add the parameters to the Google Tag configuration like so:
- Define variables reading the URL query parameters
- Adding the session_id and client_id variable values to the Google Tag configuration.
Define the URL parameter variables
You need to add two variables for client_id and session_id. To add new variables reading the URL query parameters, following this step:
- Login to your tagmanager and switch to the Variables tab
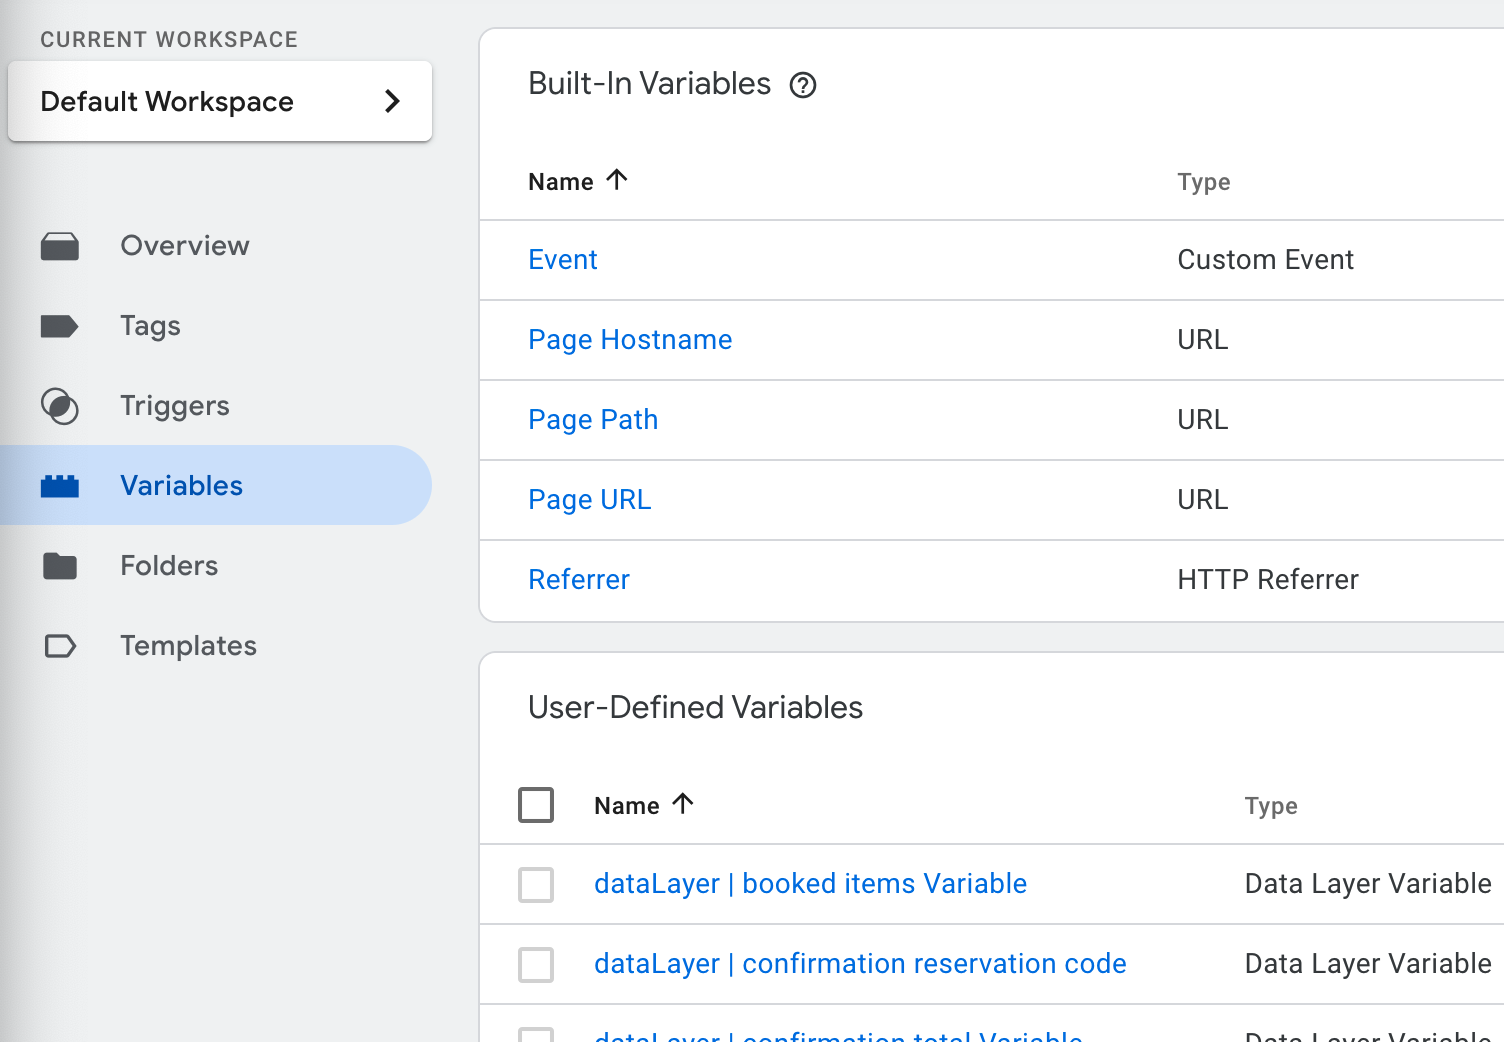
- Click on New in the User-Defined Variables pane

- Give the Variable a "speaking" name and make it self-explanatory (eg.: "Google Analytics 4 | URL Parameter client_id")

- Click on the Variable Configuration and choose the URL option of the Navigation group
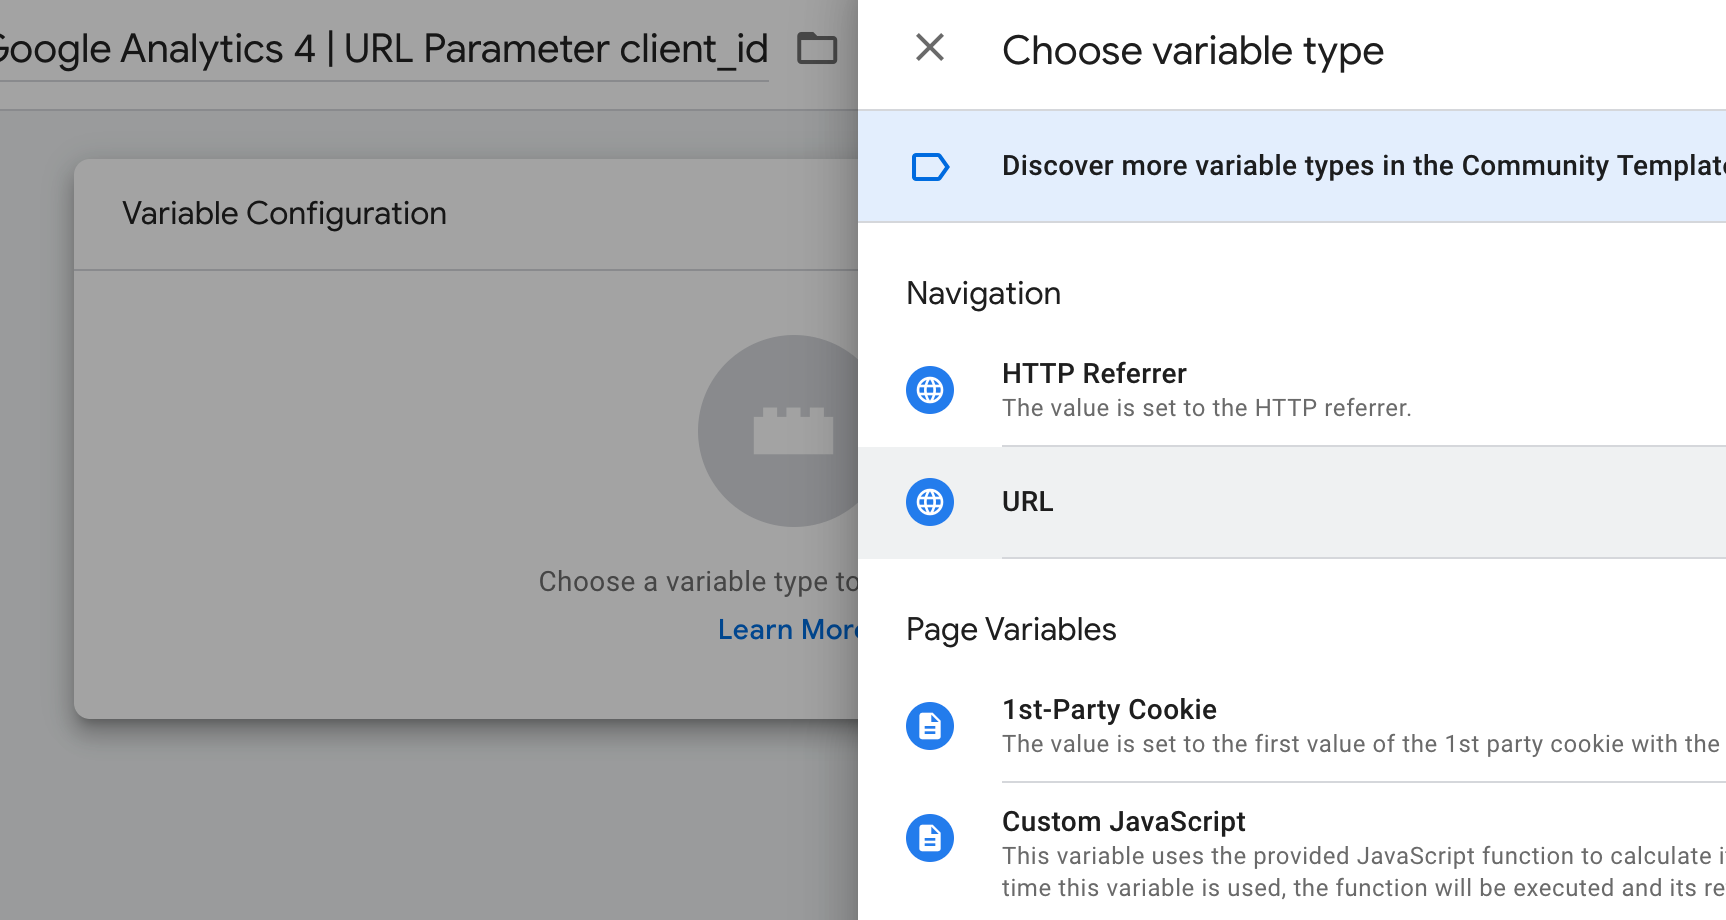
- Select "Query" as Component Type and add the parameter name client_id (or session_id when you setup the second variable) as "Query Key".
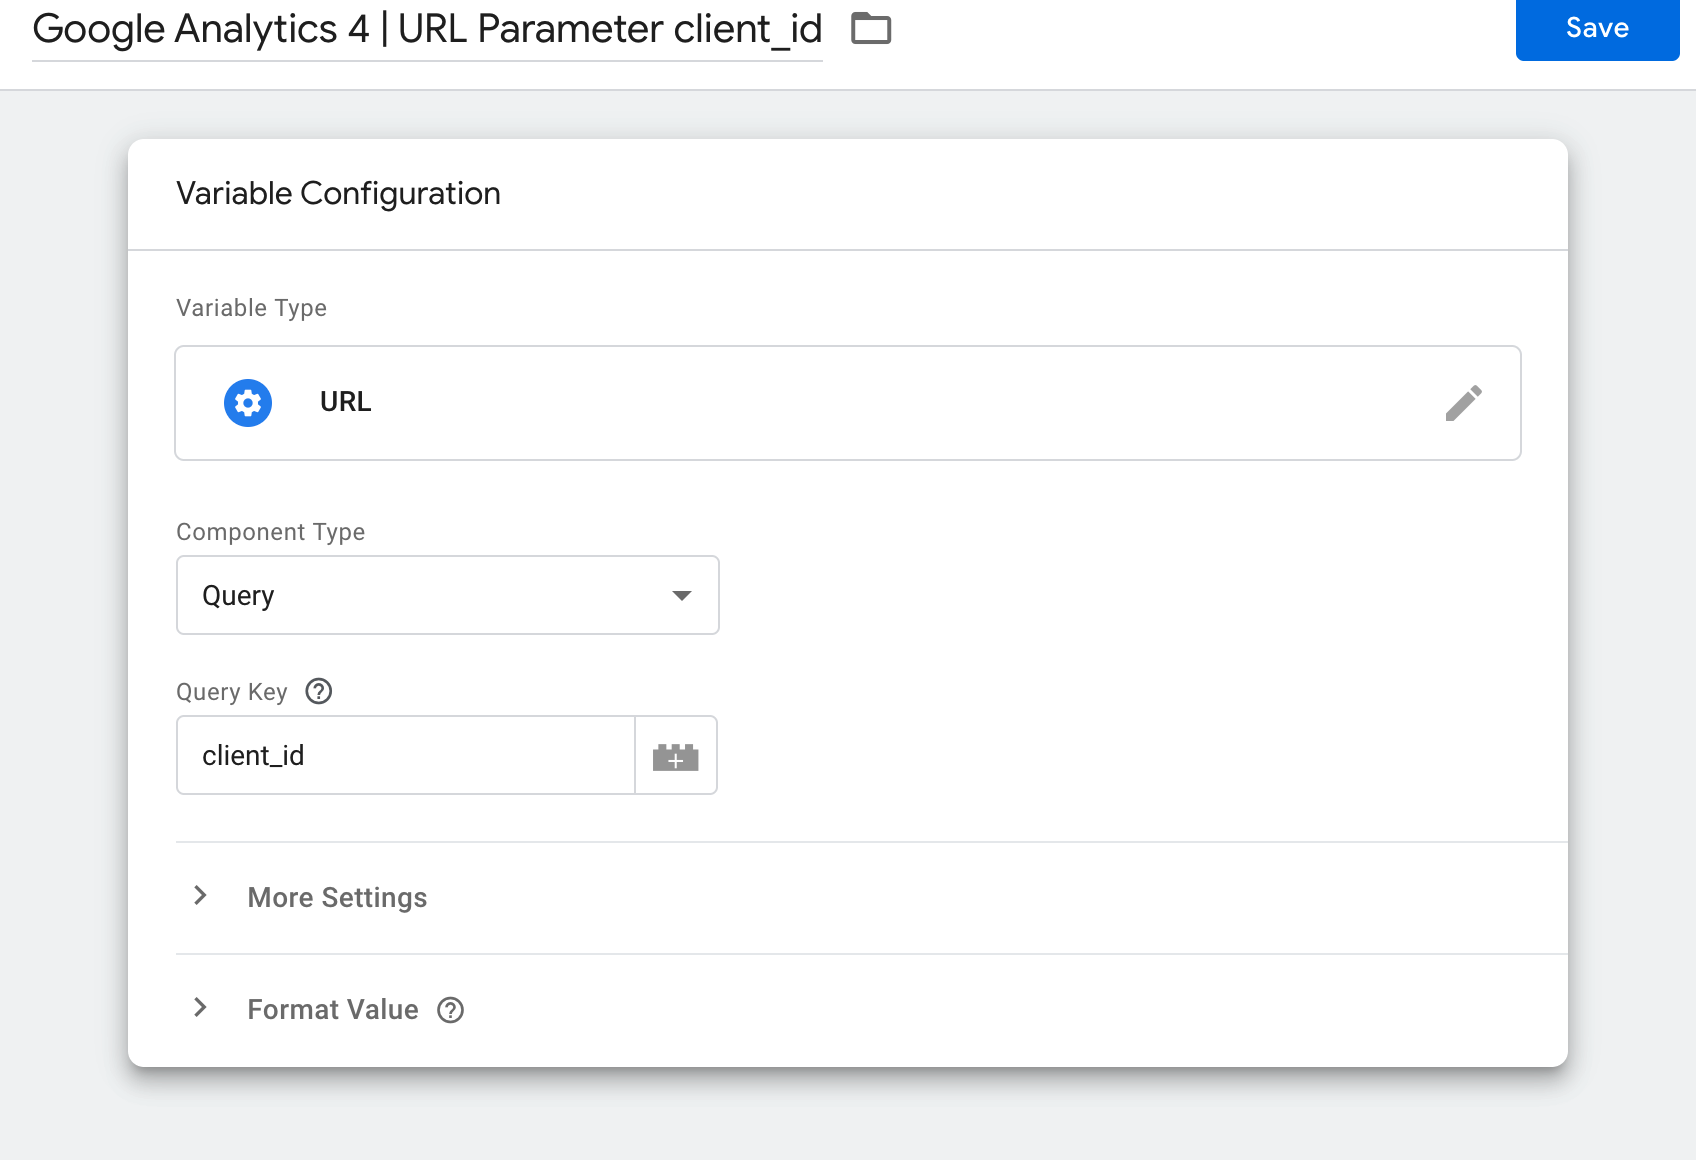
- When done, click on Save
Do these steps for the session_id and the client_id.
Adding Variables to Google Tag Configuration
To add the client_id and session_id variables to the GA4 configuration, you need to add them in the Google Tag configuration like so:
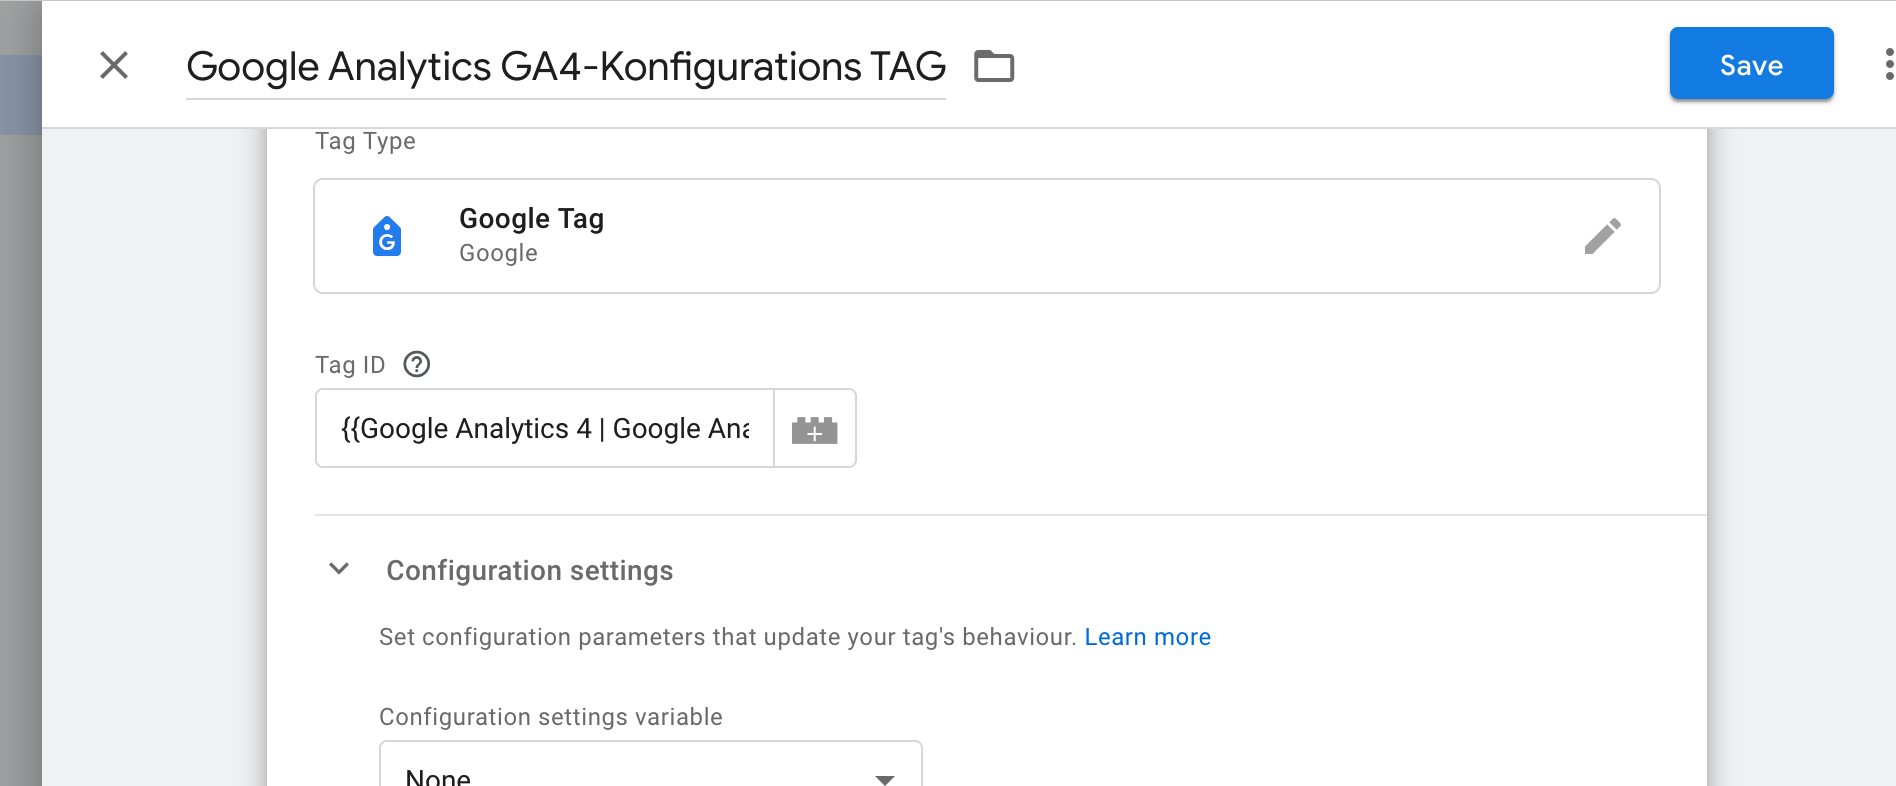
- Go to the Tags tab
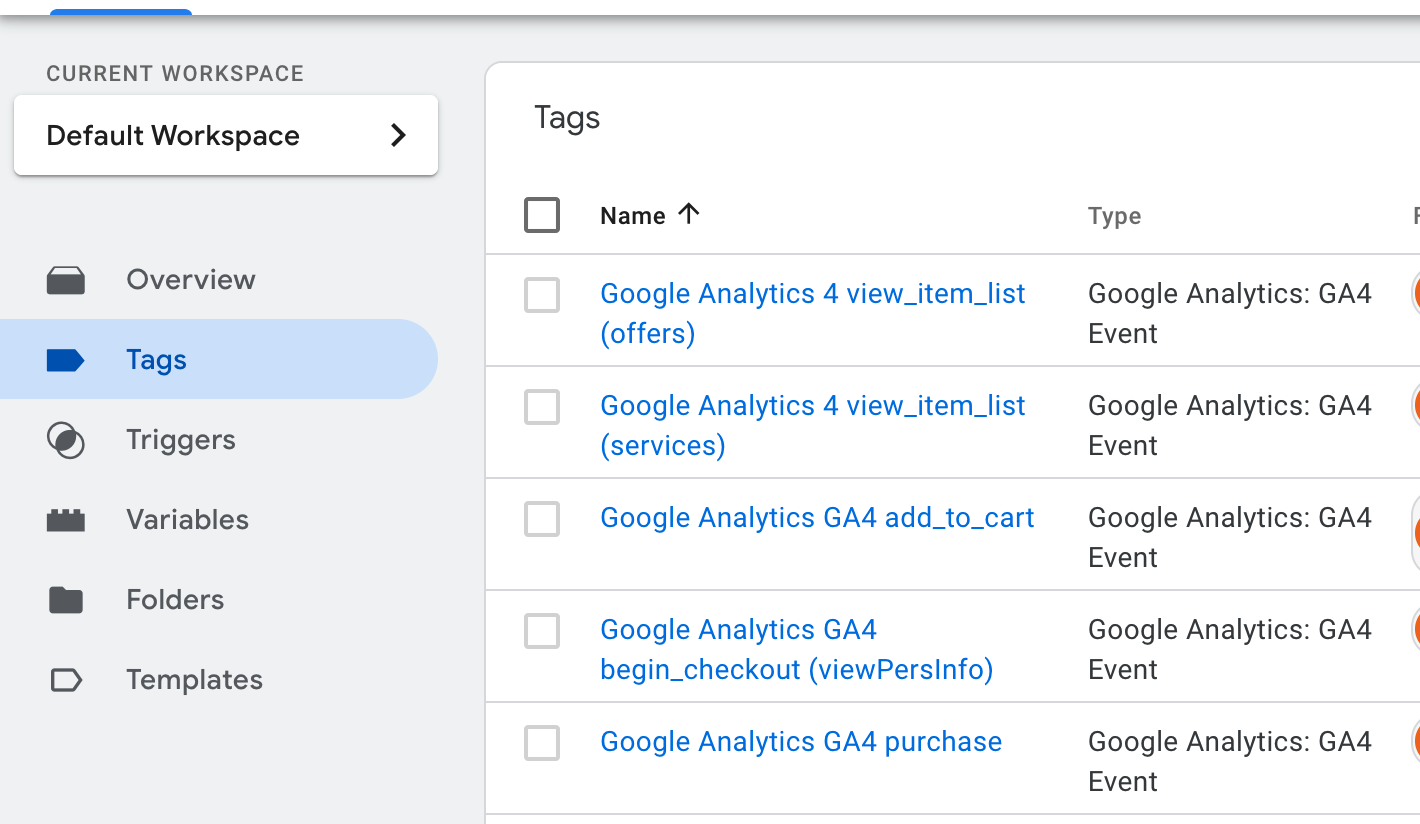
- Search for the Google Analytics GA4-Konfigurations TAG and open it by clicking on it
- Click on the Configuration settings area and click two times on "Add Parameter"
- Add client_id and session_id parameters. Utilize the variables by clicking on the +-lego-button on the right-hand side of the input box.
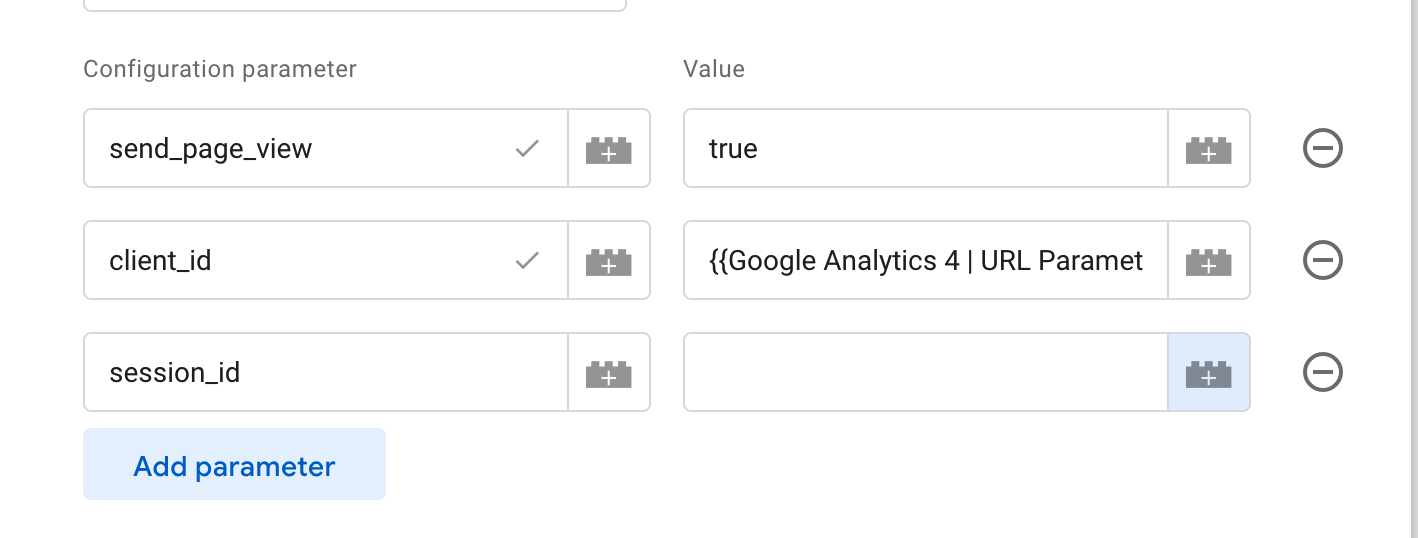
- Select the variable as defined

- When you set both client_id and session_id, click on "Save"
Now your tag manager will utilize the URL parameters and carry over tracking sessions from other cross domains.
Configuring Widgets Cross Domain Tracking
To make the Widgets aware of the client_id and session_idparameters, you need to provide the ga4 url transformer to the settings like so:
__KBE.settings({
"id": "BOOKINGWIDGET", // may be different
"propertyCode": "<YOUR-HOTEL-ID>",
"urlTransformers": [
{
id: 'ga4',
measurementId: '<MEASUREMENT-ID>',
googleAdsId: '<GOOGLEADS-ID>',
},
],
});
You'll find detailed information in the cross domain tracking documentation.